|
<< Click to Display Table of Contents >> Building a Plan |
  
|
|
<< Click to Display Table of Contents >> Building a Plan |
|
Once plan has been created, you can put it together it using the Control Panel > Manage Plans > [Plan] > Build link. Note that this link is only active if the plan status is Offline.
A plan consists of rows that are analogous to headings, sections or paragraphs in a written document.
For Free-form plans the structure can be made hierarchical and can consist of , Action Rows and Information Rows.
For Goal-based plans, only Header Rows can be defined. The goals under each header are added and updated by assigned portal users.
A Header Row lets you add child rows to group other rows. Does not allow field input or linking.
An Action Row allows for field input, linking and due dates but does not let you add child rows.
An Information Row is intended for information only and does not allow field input, linking or child rows.
The build page consists of two panels:
The left panel contains the Plan Tree. This is a dynamic representation of the plan structure. You can edit a plan using this tree.
The right panel contains the Row Attributes. This displays details about the selected row. You can edit the row attributes in this panel.
You can re-size the panels by clicking on the vertical divider bar and dragging it to the right or left.
When you start building a new plan, the left panel will display only the Plan root. In the right panel, click the Add row link and the following row attributes will display:
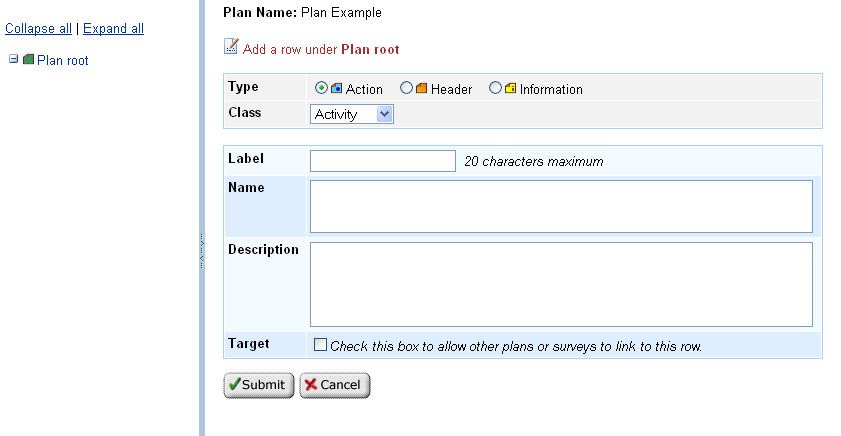
The editable attributes consist of the following:
1.Type: Select the type of row. The default setting is an Action row.
2.Class: Select the row class. This sets the graphic displayed in the Edit plan and Snapshot views. Not available for information rows.
3.Label: Enter a label for the row, e.g. a paragraph number such as 2.1 or a short title. Cannot exceed 20 characters.
4.Name: Enter a name for the row.
5.Description: Enter an optional description. This will appear below the row name in the Edit plan view.
6.Target: Check this box to allow other plans or surveys to link to this row. Only available if overall plan allows report linking; see Manage plan. Not available for information rows.
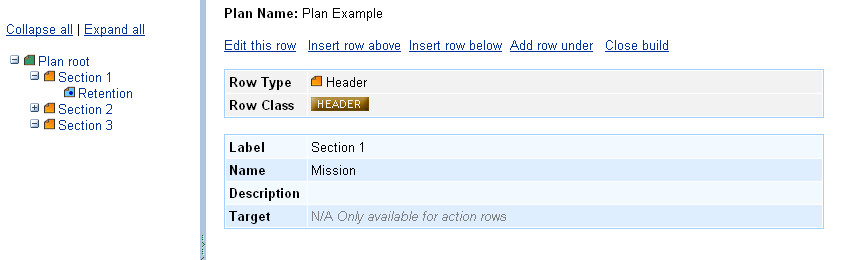
As you continue to add rows, the tree in the left panel will grow and show the hierarchy. If you need to view an existing row, click on the link and the detail screen will open in the right panel.
At the top of the detail screen there will a number of links. You can Edit the row details or Insert a row above or below it. If the row type you have selected is a header, you will also be able to Add a row under (i.e. add a child row). If the row type is Header and it has child rows (as in the example below), the Delete row link will not appear until any child rows have first been deleted.
You can change the order or hierarchy of rows by clicking the Move this row link.
When you want to stop building the plan, click the Close build link to return to the plan list. You can continue building the plan later as required.